How do I remove the drive cable from my R/C boat?

In order to remove your drive cable, you will first loosen the two set screws in the shaft ferrule. This will be the tapered cylinder between the transom and the shaft strut. Next, you will loosen the cable collet compression nut, which is the 9/16″ hex nut on the end of the collet. This will allow you to remove the cable. Slide the propeller shaft towards the rudder until it is released from the ferrule, pull the ferrule down slightly until it clears the bottom of the strut, and pull the cable straight out the back. Clean the cable, wipe any grease off it, spray with a penetrating oil to remove any trapped water or any other foreign fluids. Re-grease and store for the winter. To reinsert the cable, simply reverse the process.

Can you tell me a little more about soldering drive cables?

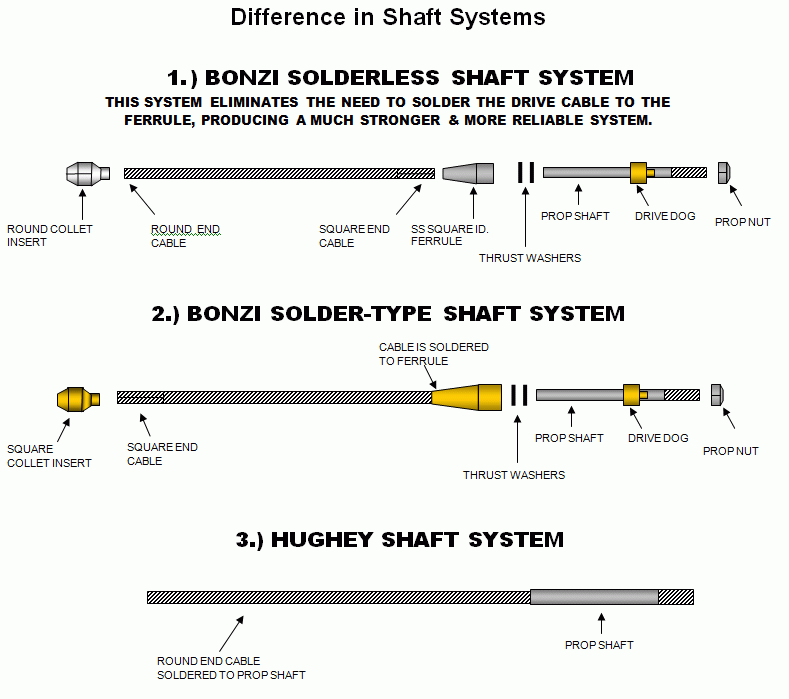
We highly recommend our solderless drive cable assembly.  It uses a round collet to a square ferrule.  The cable does not have to be soldered, which means that you have a much stronger connection. If you choose to go with a setup where soldering is necessary, here is what we recommend:

Stay-Brite Silver Solder (which comes with its own flux) is the only brand we use or recommend.  We use a propane torch with Mapp gas (it burns hotter).

General Soldering Procedure:

Lightly sand the cable to the length that will be inside the ferrule, clean with acetone, apply the flux to the cable, and slide the ferrule over the end of the cable so the flux transfers to the ferrule.  Put the cable assembly into a vise with the cable hanging straight down, and clamp so it supports the ferrule in the proper position.  Cut about 3 pieces of silver solder (approx 1/8 inch long each), and drop those into the ferrule – the pieces will rest on the exposed cable.  Then take the torch and heat the outside of the ferrule, working the heat around the outside perimeter until the solder starts to melt and flow – immediately pull the heat away.  If you apply any heat directly to the cable, it removes the temper and causes failure.

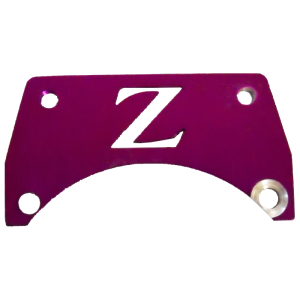
I ordered an anodized Coil Mount “Z” Plate – why is there a silver spot where it looks like someone has drilled a hole in one of the corners?

If you are looking at the Z plate with the Z facing you, the lower right-hand hole will have some of the metal machined so that the silver is showing.  Also, the upper right-hand threaded hole will have silver showing in the threaded area.  This is done for grounding purposes.  The grey ignition coil must ground all the way through to the main case in order for it to work properly.  This is why you will notice some color missing on colored plates.  They are not damaged.